
Figure 25 - Email Notification
If a request has been assigned to you, there are two ways to access the request:
When you receive an email notification, the email will include a request summary, the request number, the due date and a link to access the request. Clicking on the link will display the request. If you are not logged in, the system will prompt you to Sign-in before you can proceed. (See Figure 25).
Figure 25 - Email Notification
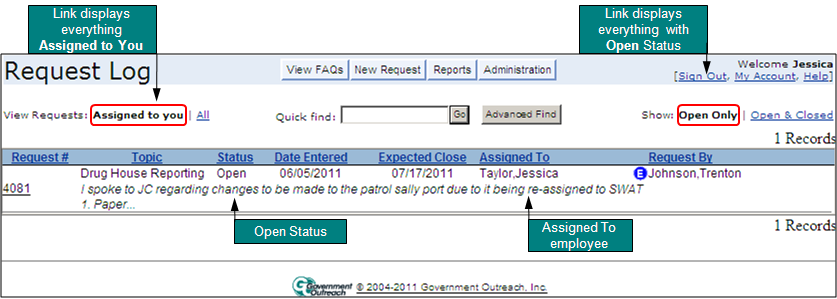
Figure 26 - New Request in Request Log
Figure 27 shows the different sections of a request. Notice this screen has additional sections compared to the initial intake of the issue on the New Request Screen.
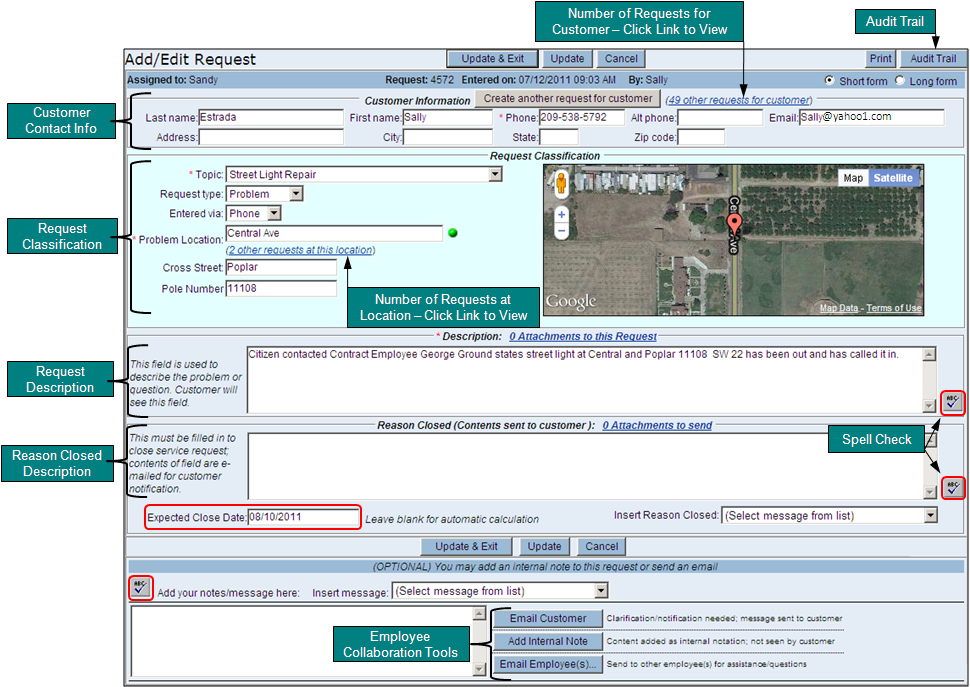
Figure 27 - Received New Request from Citizen
Field Descriptions for Figure 27 - A Request "Assigned to You"
The Collaboration Tools allows you to communicate or collect more information from the customer and/or other employees by email before closing the request. You may also add internal notes to the request in this section.
To use these tools, type your question or message in the box provided to the left and then select one of the buttons to the right: Email Customer, Add Internal Note, or Email EmployeeÆs (See Figure 28). If you selected the Email Customer, your question will automatically send an email to the citizen. If the customer responds to the email, their response will be displayed on the Request Screen. If the customer did not provide an email address, the ōEmail Customerö button will be disabled.
Adding Internal Notes are a useful way to record general notes regarding correspondence with the customer or reminder notes to track the progress of the request. To add notes to a request, type your message into the box, and select the ōAdd Internal Noteö button. Your comments or questions will display on the Request Screen. The citizen, however, will not see the Internal Notes in any email notification or on their online account.
You may also email other employees by using the ōEmail Employee(s)ģö button. This allows you to correspond and obtain information from employees in other departments. The customer will not see this correspondence with other employees through email or on their online account.
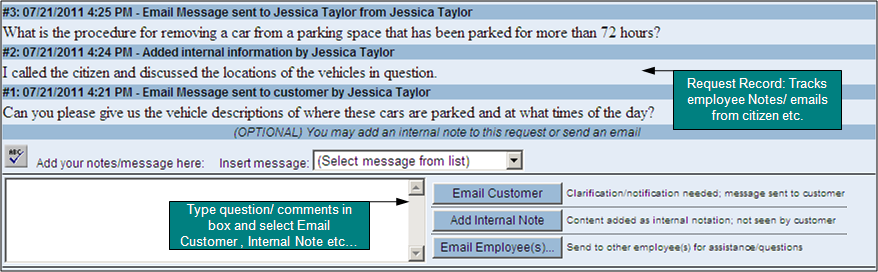
Figure 28 - Employee Collaboration
Important: Any time you enter or change information about a Request, it is not saved until you press one of the Update buttons at the top of the screen. (Not shown in Figure)
Closing a request requires a description in the Reason Closed field. You may type in a custom message or use a standard response saved in the menu called "Insert Reason Closed" (See section: Canned Responses for more information). Select one of the "Update" buttons and the system will prompt you to change the status to "Closed." This dialog box is shown in Figure 30. Be sure to select OK to close the request Status. If "Cancel" is selected, the Request status will remain open and you will need to manually close the request. (See the following section).
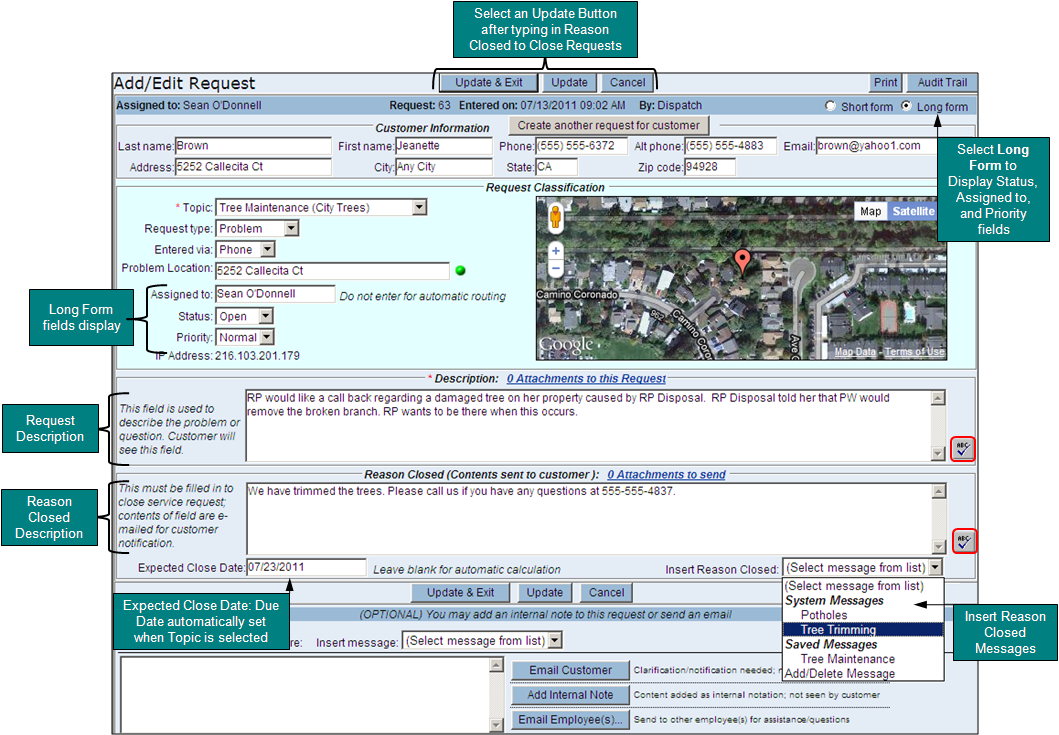
Figure 29 - Closing a Request
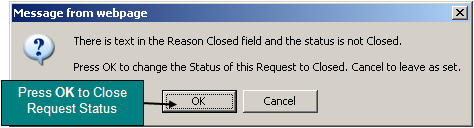
Figure 30 - Changing the Request Status to Closed
Manually Closing the Request
If there is text inserted into the Reason Closed box, but the request status is Open follow these steps to close the request.
The Expected Close Date in Figure 30, is automatically calculated when the topic was selected. If the request will take longer to resolve, you may change this date by typing in a new date, and Updating the request. If this date is changed, you should notify the customer either by email or by a phone call as the system will not send an email notification to the customer.
If you receive the same questions or issues from citizens frequently, it is useful to create a "canned" or standard response. These standard responses are stored in a list called the ōInsert Reason Closedö field on the Request Screen. (See Figure 29 above). When a canned response is selected from the list, the response will be inserted into the ōReason Closedö field.
To create your own canned messages, find the ōInsert Reason Closedö field toward the bottom right on the request assigned to you. Select the drop down menu, and choose ōAdd/Delete Messageö (See Figure 29 above). A dialog box will appear (See Figure 31). (*Note ¢ Be sure to enable pop-up windows for your browser). Give the response a name and type the canned message. Select ōAdd Messageö to add it to the "Insert Reason closed" menu. You will now be able to select this message for a Reason Closed Response.
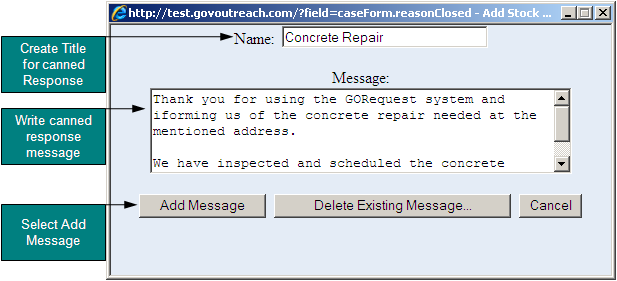
Figure 31 - Canned Response Dialog Box
To delete a canned response from the "Insert Reason Closed" list, select the ōAdd/Delete Messageö from the ōInsert Reason Closedö menu (See Figure 29 above). A Canned Response Dialog Box will appear blank. Select the ōDelete Existing Messageö button. Another dialog box will appear to delete a message (See Figure 32). Select the pre-written response you want to delete from the menu. Then select the Delete button. (*Note ¢ Only messages saved by you can be deleted. There may be ōsystemö canned responses that your entire department can view or the entire agency can view. These are set by your IT department).
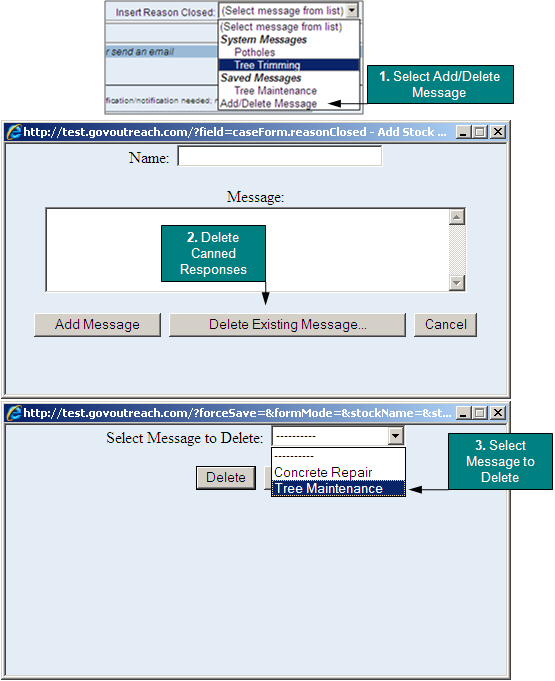
Figure 32 - Deleting a Canned Response
There are several different types of email notifications you can receive from the system. They are:
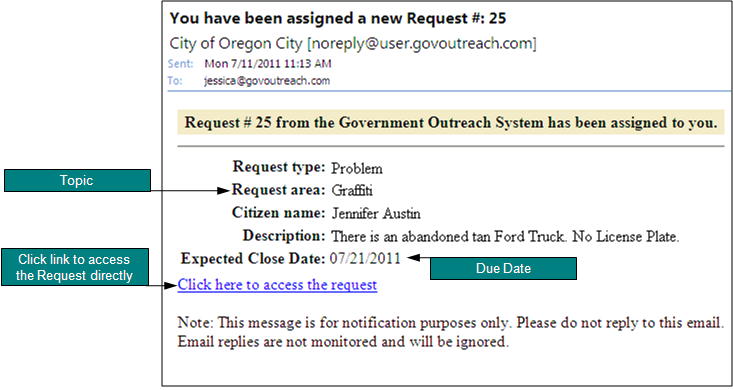
Figure 33 - Email Notification: Assigned to You
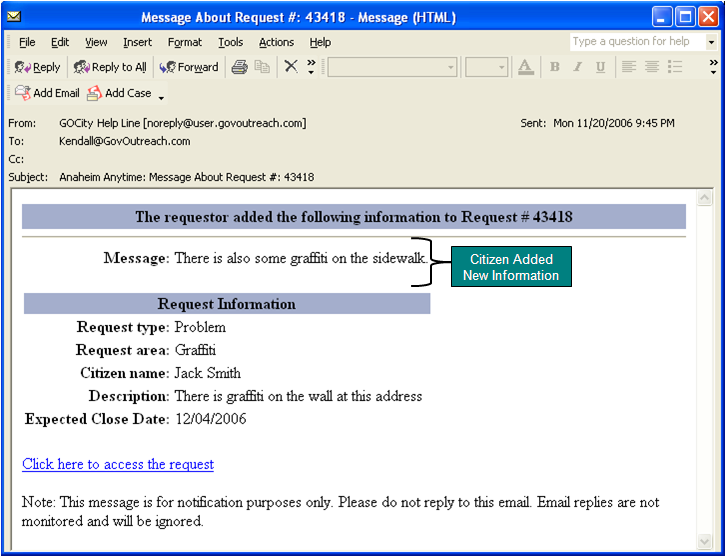
Figure 34 - Email Notification: Citizen added new informaiton to Request
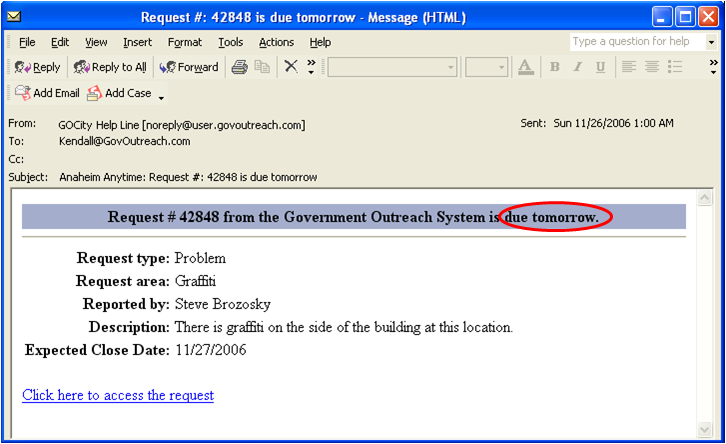
Figure 35 - Email Notification: Request Due Tomorrow

Figure 36 - Email Notification: Request Due Today

Figure 37 - Email Notification: Custom Scheduled Report